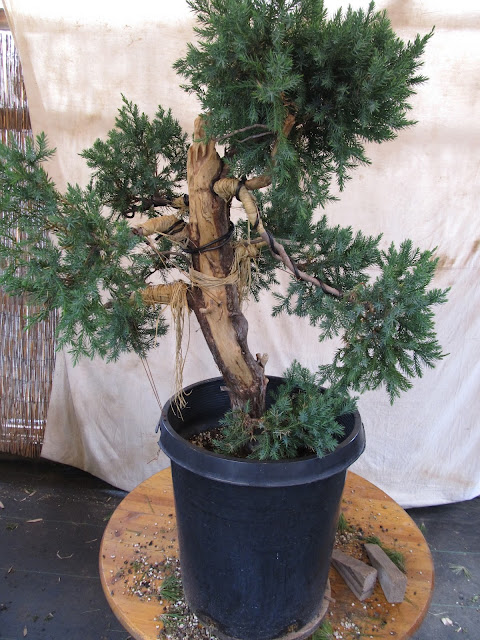
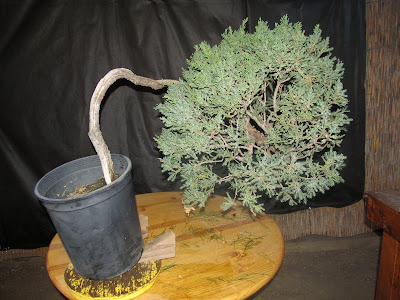
Anyhow to the tree-he won this tree in a raffle in a northern California bonsai convention. As you can see it's not really an exciting piece of material. The trunk has very little movement, and some reverse taper just about in the middle. The branches are not in the best position and the foliage is way out on the ends of the branches. There is quite a bit of shari on the trunk which we will make use of and enhance. What you see now is actually an improvement-the tree was cut back pretty hard about 6 months ago so promote some back buds.
The primary branches were wrapped with raffia and wired when the tree was first acquired. First thing to do is to give the foliage a good trim and remove the raffia and wire.
Now that I can see things the next step will be to pick a front. I cut most of the top of the can away and left a couple of handles. This makes it easier to see the base of the tree and to move it around.
There is almost no nebari to speak of so I've tentatively chosen this front because of the view of the shari's, movement of the trunk and branch placement.
I'm keeping the little branch down low with the hope that it will eventually thicken that part of the trunk. One can always hope!
The reverse taper is very evident in the above picture. We're going to try to eliminate it and create a little taper throughout the trunk by carving with a variety of power carving tools. Mostly I'll use a die grinder with a variety of bits.
First I'll use one of the big coarse wheels for fast removal of a lot of wood and to get the basic shape of the trunk.
The reverse taper is much less but still there. Need to do a some more shaping but it's a start. I'll also start to add character to the shari by making various cuts into the trunk of different sizes, shapes and depths. This adds to the illusion of age and strength to the tree.
Using several bits I've greatly reduced the reverse taper, added a little taper overall and gave the shari's some depth and character. Tilting the tree a little to the right will just about make the reverse taper disappear.
Here's a small detail that adds life and realism to the shari. The first photo below shows where a branch used to be. Using a couple of small cutter bits I was able to create the illusion of two smaller branches as well as create shadows and depth.
The carving is done for now. I'm going to let the wood dry and harden and after a year or so will do some more detailed carving to remove the tool marks and to enhance the natural aging of the wood. The last thing I'll do today is to use some guy wires to pull the primary branches into a better position. This fall the branches can be wired and placed into better positions.
Thanks for reading my blog. As always I look forward to comments and suggestions.


